Table of contents
As the world continues to expand digitally and delves deeper into the realms of digitalization, many users find themselves storing sensitive information. However, ensuring that this information remains accessible only to specific users through authorized methods or concepts is crucial. While frontend measures like using IDs or unique user specifications such as usernames and passwords are common, it's equally vital to fortify the backend against breaches. This is where mechanisms like user_ids or API keys play a significant role.
While user authentication is ideal, it may not always provide the robustness or security needed. In this article, we'll explore the utilization of API keys in PHP for content retrieval.
WHAT IS REQUIRED
It is assumed that you are familiar with performing CRUD operations in PHP to a certain level, as we will not extensively delve into them. Instead, our focus will be on creating API keys and utilizing them to retrieve data from the database. Therefore, the following packages or tools are required to be installed:
you'll require a package inclusive of a web server, PHP, and a database server. We'll be utilizing XAMPP alongside phpMyAdmin. (For macOS users, alternatives such as MAMP are available.) To initiate the installation process, please follow the link provided below: click here
Composer: for managing third-party packages and autoload class files, see the documentation
Postman: An API development tool used for testing and debugging, we will be leveraging the Postman extension within Visual Studio Code.
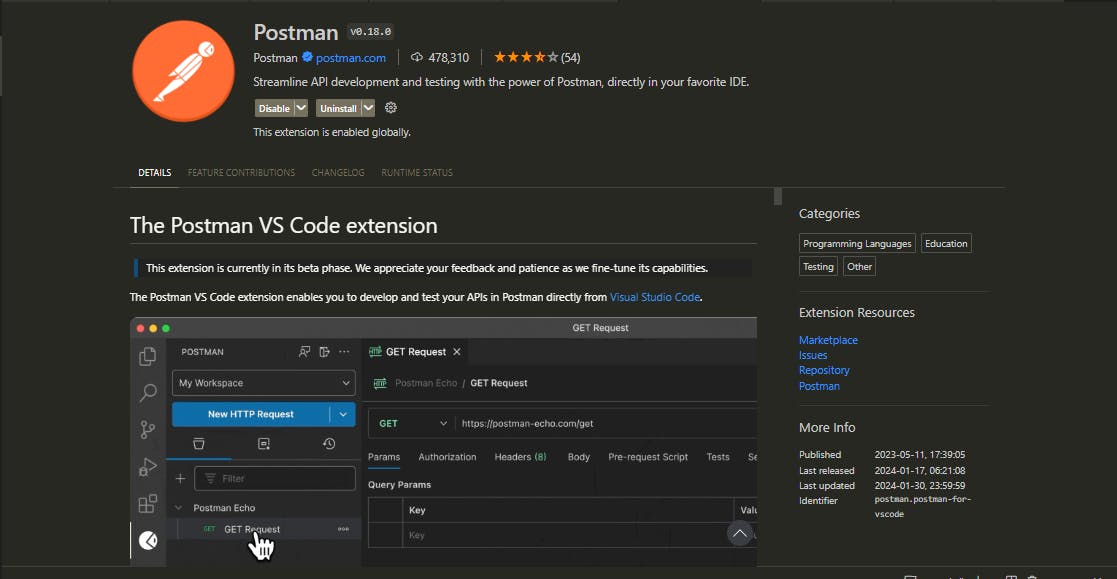
That will conclude our current requirements. As we progress, we'll introduce and utilize additional packages if needed.
LET'S BEGIN
To simplify your setup, a boilerplate including necessary files and folders has been made available in the GitHub repo link shared below. You have the option to either clone the repository or create your own from scratch.
To embark on your journey, click the following link: Github Repository
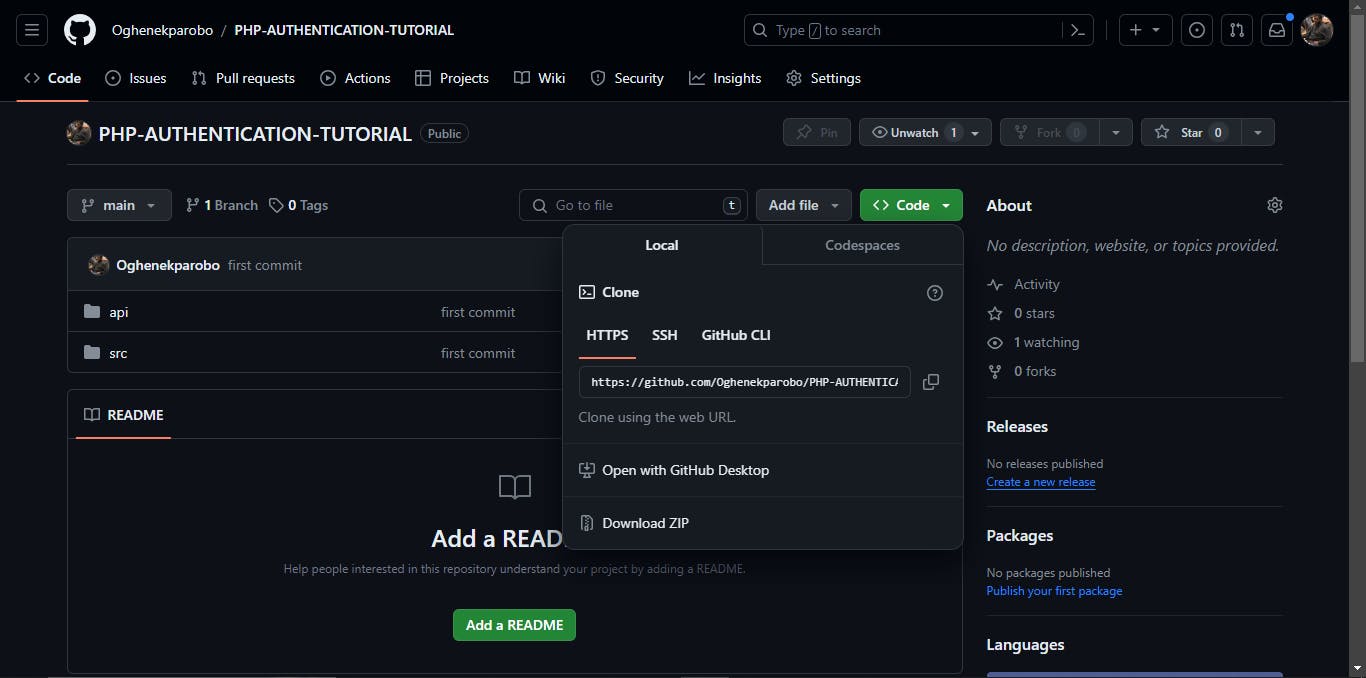
you may utilize either of the following options:
Execute the command
git clonehttps://github.com/Oghenekparobo/PHP-AUTHENTICATION-TUTORIAL.gitin your terminal.Alternatively, download the ZIP file.
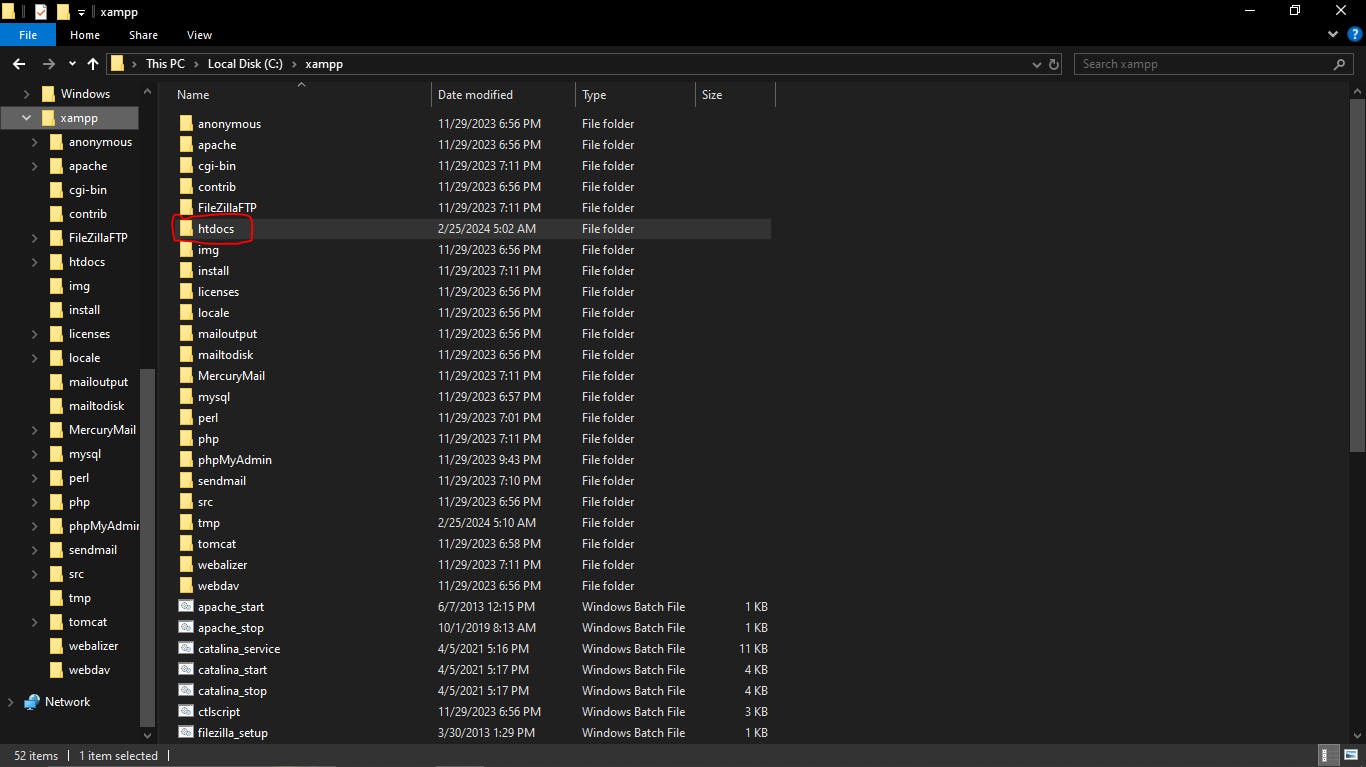
Assuming you've completed the necessary setup, let's dive in and get started. You'll notice we have two folders: an "api" folder containing an "index.php" file, which will serve as the endpoint for our requests, and an "src" folder where our classes will reside. These classes will be dynamically loaded into our application using Composer's autoloader, a concept we'll become familiar with as we proceed further.
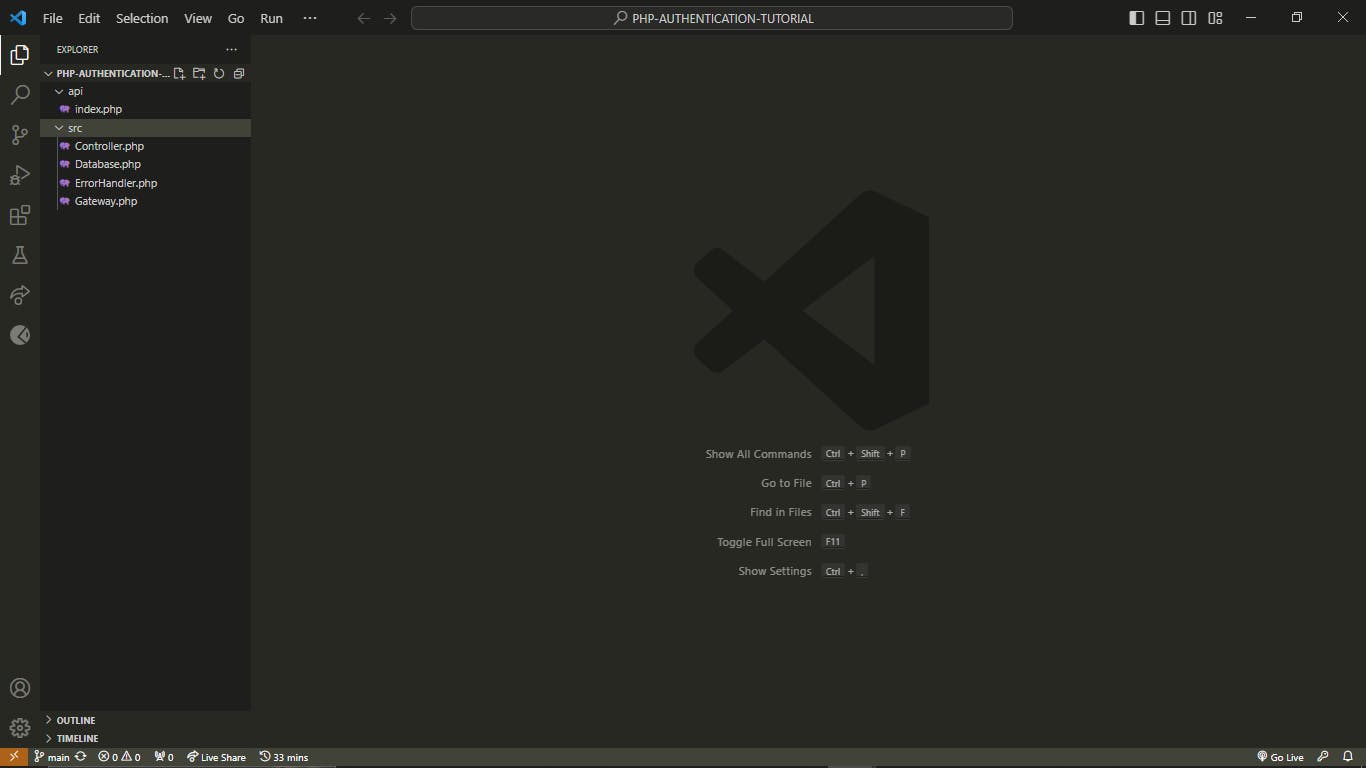
The ErrorHandler.php class serves as a generic error handler, designed to output warnings in JSON format. and allows for customization to suit specific project requirements.
class ErrorHandler
{
    public static function handleError(int $errno, string $errstr, string  $errfile, int $errline)
    {
        throw new ErrorException($errstr, 0, $errno, $errfile,   $errline);
    }
    public static function handleException(Throwable $exception): void
    {
        http_response_code(500);
        echo json_encode(([
            "exception" => $exception->getCode(),
            "message" => $exception->getMessage(),
            "file" => $exception->getFile(),
            "line" => $exception->getLine(),

        ]));
    }
}
MAKING OUR FIRST REQUEST
If you've cloned the recommended GitHub repository, your URL will appear as follows: http://localhost/PHP-AUTHENTICATION-TUTORIAL/api
Submit the URL in your preferred API tool or HTTP request tool. We'll be utilizing Postman within VS Code for this demonstration.
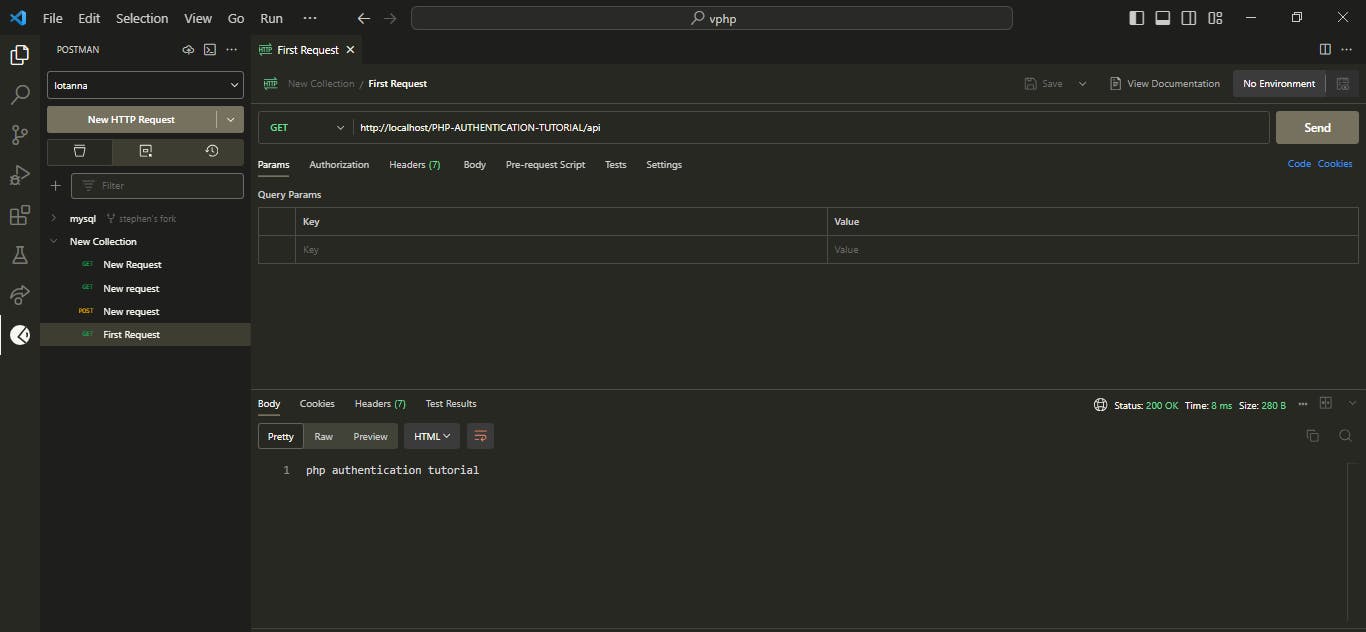
Congratulations on successfully making an API request, Hurray!
ADDING COMPOSER AUTOLOADER AND .ENV PACKAGE
We'll dynamically load classes in our application using the spl_autoload_register function. You can find more information about it in the documentation Here it's worth noting that for this course, we'll be utilizing the Composer's autoloader.
When establishing our database connection, it's crucial to ensure our application is properly configured to facilitate easy variable management and updates. Additionally, we must prevent the client side from accessing sensitive information such as our database configuration using an .env file added-in or .gitignore file of course. One widely used approach in storing sensitive information is utilizing a .env file. In PHP, we'll implement this using the vlucas/phpdotenv library.
Without further ado let's get right into them:
To use Composer Autoloader to load classes automatically, create a composer.json file in your project's root folder.
composer.json file:
{
    "autoload": {
        "psr-4": {
            "":"src/"
        }
    }
}
require or include statements.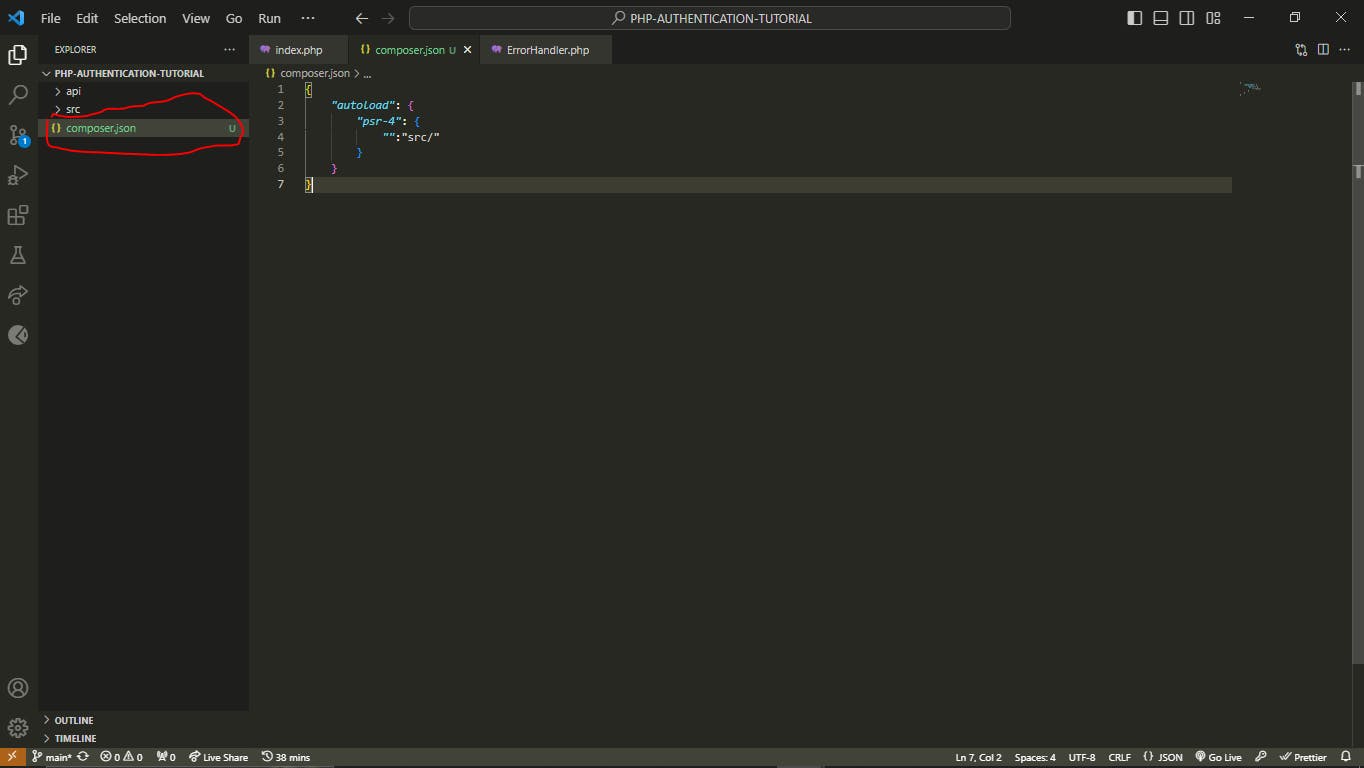
To execute the command composer dump-autoload in your project's terminal. This command regenerates the Composer autoload files based on the dependencies defined in your composer.json file. After successfully running the program, a vendor folder will be generated in your project directory. This vendor folder will contain all the composer dependencies required for your project.
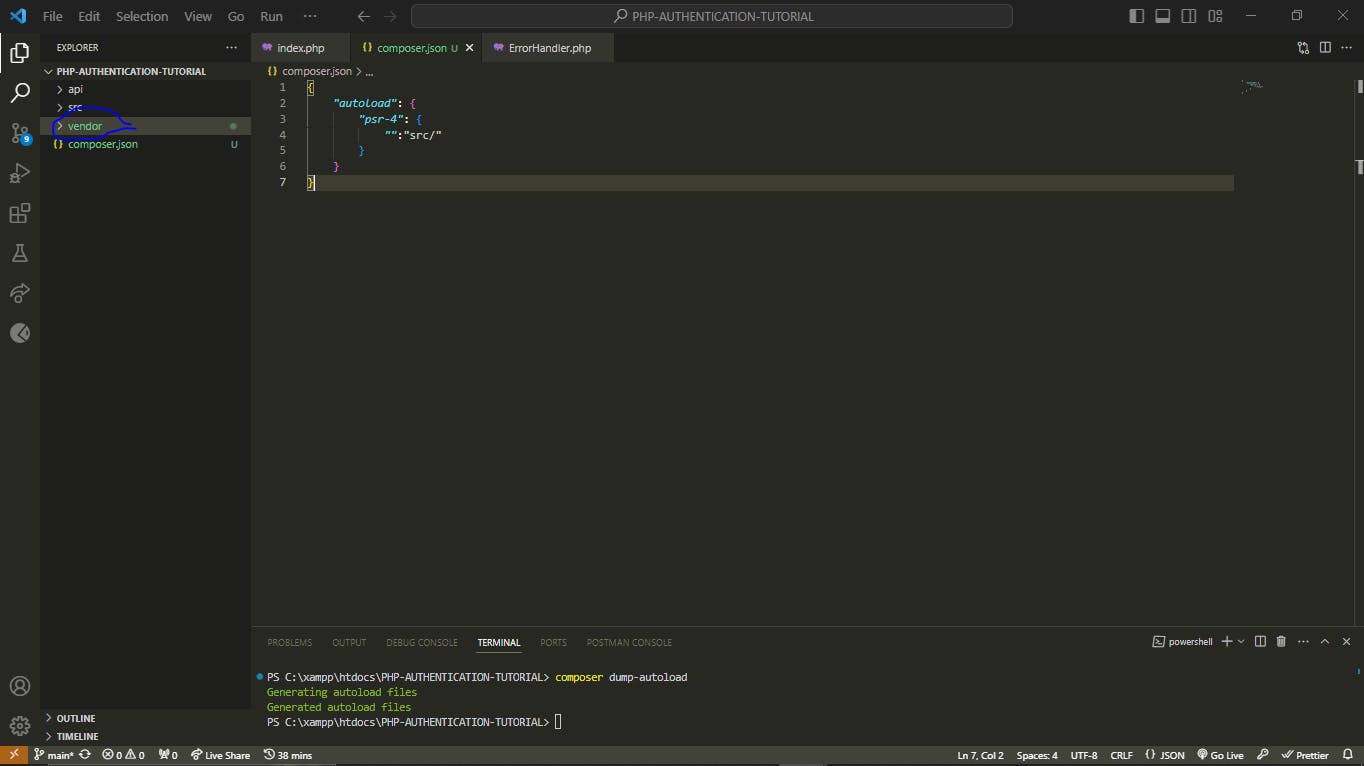
Now that we've successfully implemented the autoloader, let's add a .env file using the package mentioned earlier. Then, we'll dive deeper into the implementation by creating our database and tables and get our hands muddier.
Installing .env package
We'll incorporate the vlucas/phpdotenv package into our project. To install it, execute the following Composer commands:
composer require vlucas/phpdotenv
Once the installation is complete, we can proceed to add our application configuration to a .env file located in the root directory of our project. Remember to exclude the .env file from version control by adding it to your .gitignore file.
This should have the ENV variables you need to set, for this project, this is what we will require for database configuration:
DB_HOST= 'your_db_host'
DB_NAME = 'your_db_name'
DB_USER = 'your_db_username'
DB_PASS = 'your_db_password'
Your folder structure should resemble the following:
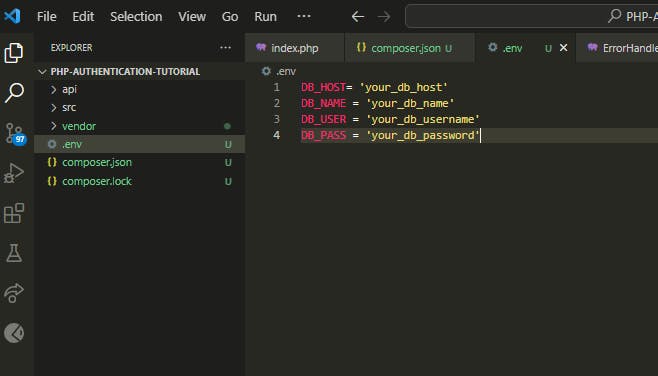
Now, let's test our environmental variables in the application:
To incorporate the .env variables into our application, add the following script to the index.php file located inside the api folder of your application:
$dotenv = Dotenv\Dotenv::createImmutable(dirname(__DIR__));
$dotenv->load();
This script will load the .env file and make its variables available for use within your application.
To ensure proper JSON data interpretation, add the following line to the index.php file:
header("Content-type: application/json; charset=UTF-8");
This will ensure that our API responses are correctly formatted in JSON.
Although data is not currently interpreted in JSON format, we need to include the necessary headers to ensure adherence to proper architectural standards and prevent oversight in the structure of the application.
Displaying the .env variables
To ensure smooth operation and error handling within our project, it's essential to properly configure our autoload class and error handling mechanisms. Failure to do so may result in unexpected errors, hindering the functionality of our application.
To begin, let's not overlook the importance of including our vendor folder or autoload class. This step is crucial for loading our classes and packages seamlessly. Without it, attempts to access classes or packages may lead to errors. To rectify this, we must add the autoload class to our project.
In our index.php file, it's imperative to include the autoloader class generated by Composer. This ensures that our project can automatically load classes and dependencies. We can achieve this by adding the following line at the top of our index.php file:
require dirname(__DIR__) . '/vendor/autoload.php';
Next, let's address error handling. Proper error handling is essential for identifying and resolving issues efficiently. By implementing error handling classes, we can effectively manage errors and provide relevant error messages to users.
To set up our error handling classes, we need to register them within our application. We accomplish this by specifying error and exception handlers. These handlers will intercept errors and exceptions, allowing us to manage them appropriately.
set_error_handler('ErrorHandler::handleError');
set_exception_handler('ErrorHandler::handleException');
By configuring our autoload class and error-handling mechanisms in this manner, we ensure the smooth operation of our application. Errors are handled gracefully, and we receive clear and concise error messages, which also makes debugging easier.
In the index.php file, include the following code to display our environmental variables
echo $_ENV["DB_HOST"] . " ";
echo $_ENV["DB_NAME"] . " ";
echo $_ENV["DB_USER"] . " ";
echo $_ENV["DB_PASS"];
This will output the values of the environmental variables DB_HOST, DB_NAME, DB_USER, and DB_PASS
now our application structure should look like this:
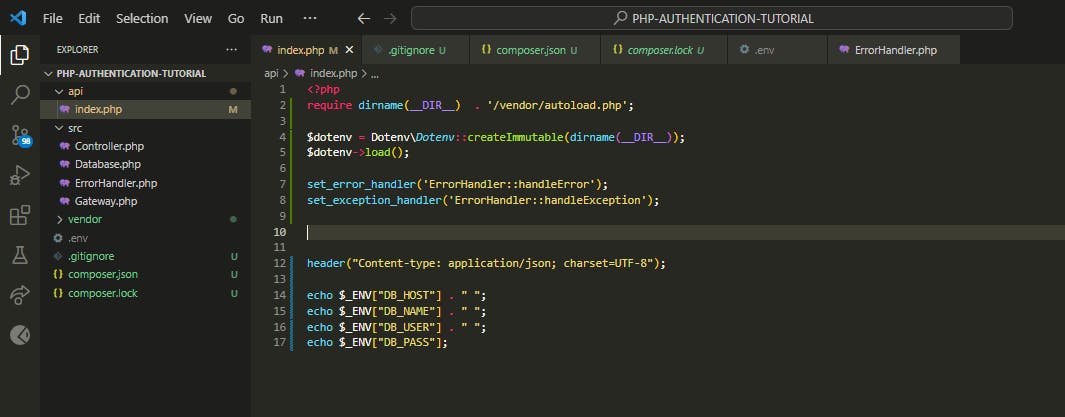
The repository can also be cloned by following the provided link: here.
But hey, I did it to keep things simple for you as you follow along. Sometimes, diving in headfirst is the best way to learn, right?
so go ahead, and learn from this setup, but remember to keep your projects tidy and secure. Happy coding!
Now, the moment we've been waiting for: if you've been following along, your URL should either be http://localhost/PHP-AUTHENTICATION-TUTORIAL/api or http://localhost/PHP-AUTHENTICATION-TUTORIAL/api/index.php. However, it might be different depending on your folder structure or the names you've used for your project. Please adjust accordingly.
When you fire the API, you should have your .env variables displayed:
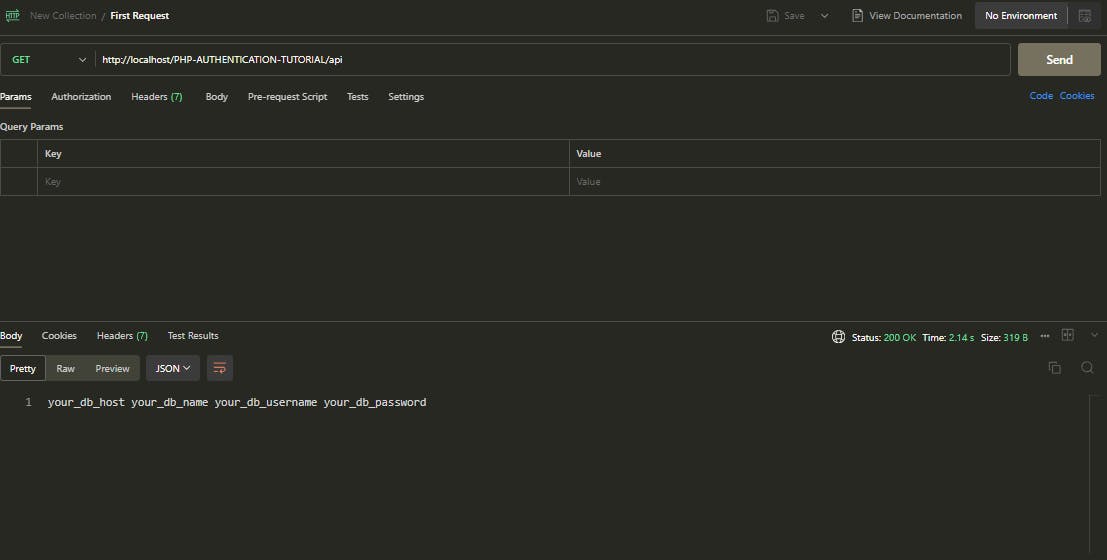
Congratulations on making it this far! You deserve some appreciation. Treat yourself to a cappuccino, a donut, or some ice cream.
Success is not final, failure is not fatal: It is the courage to continue that counts. - Winston Churchill
SETTING UP OUR DATABASE
Now it's time to create our database and set up our DB connection.
For starters, in this simple project, we will be working with a system to retrieve student data. Therefore, our database name will be college, and we will require two tables: students and user. The user table will store authorized user details, including the API key, which we will use to access student information.
Let's proceed with creating our database now:
We're utilizing XAMPP, hence the server housing our database will be PHPMyAdmin
Create the database named
college; click on new and the proceed to add your DB name.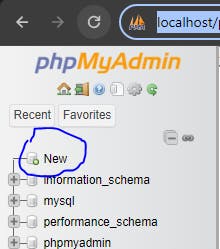
Click on Create after inputting your database name.

Voilà! We have successfully created our college database. Now, let's proceed to create our students and users tables. Input the following SQL commands into the SQL tab in your database section.
Students Table
CREATE TABLE students (
    id INT AUTO_INCREMENT PRIMARY KEY,
    name VARCHAR(255),
    age INT,
    gender VARCHAR(10)
);
copy and paste this command into the SQL tab in your database (college) to create the students table.
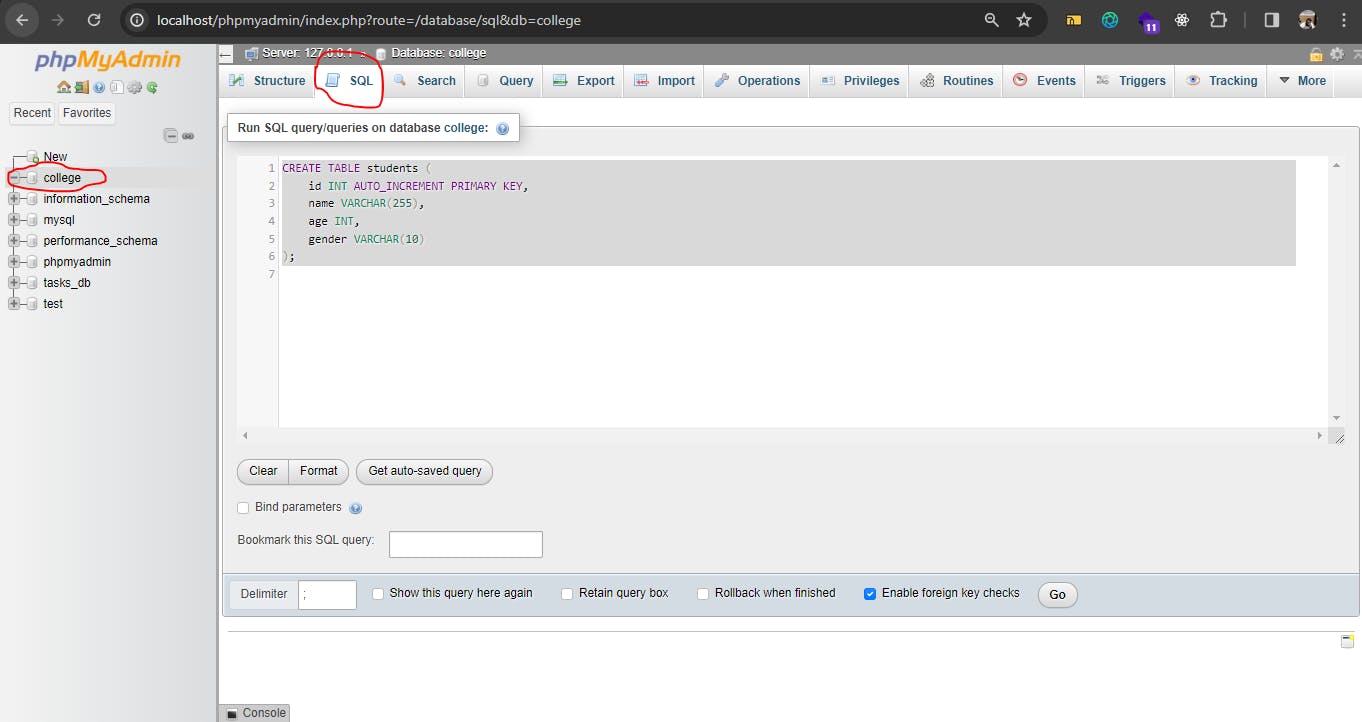
After executing the command, ourstudentstable will be created.
User Table
To create our user table run the SQL command:
CREATE TABLE user (
    id INT AUTO_INCREMENT PRIMARY KEY,
    name VARCHAR(255),
    username VARCHAR(255),
    password_hash VARCHAR(255),
    api_key VARCHAR(255)
);
register.php file in the root directory of our project. In the frontend interface, users will be able to register to obtain their API keys. We will then use these API keys to retrieve the data from our student table. Finally, we will establish our database connections.To populate the student table with some data, let's run the following SQL command:
INSERT INTO students (name, age, gender) VALUES
('John Doe', 20, 'Male'),
('Jane Smith', 22, 'Female'),
('David', 21, 'Male'),
('Bob Brown', 23, 'Male'),
('Emily Davis', 19, 'Female'),
('Michael Wilson', 20, 'Male'),
('Sarah Taylor', 22, 'Female'),
('David Clark', 21, 'Male'),
('Emma Martinez', 19, 'Female'),
('James White', 23, 'Male'),
('Chinedu Obi', 24, 'Male'),
('Chioma Nwosu', 20, 'Female'),
('Adesua Adeleke', 22, 'Female'),
('Emeka Okoro', 25, 'Male'),
('Ngozi Okafor', 21, 'Female');
After the student table has been populated, the next step is to create a database connection for retrieving data from the student table. This connection should be established without the utilization of an API key to ensure proper functionality testing of the project for now.
without further ado let's connect our project to our database:
We will be using PDO to connect to our MySQL database.
In the Database.php file, please insert the following code snippet to the class.
class Database
{
    private ?PDO $conn = null;

    public function __construct(
        private string $host,
        private string $name,
        private string $user,
        private string $password
    ) {
    }

    public function getConnection(): ?PDO
    {
        try {
            if ($this->conn === null) {
                $this->conn = new PDO("mysql:host=$this->host;dbname={$this->name}", $this->user, $this->password);
                $this->conn->setAttribute(PDO::ATTR_ERRMODE, PDO::ERRMODE_EXCEPTION);
                $this->conn->setAttribute(PDO::ATTR_EMULATE_PREPARES, false);
                $this->conn->setAttribute(PDO::ATTR_STRINGIFY_FETCHES, false);
            }

            return $this->conn;
        } catch (PDOException $e) {
            echo "Connection failed: " . $e->getMessage();
            return null;
        }
    }
}
To confirm that our database connection is operating correctly, we need to integrate the following code snippet into our index.php file situated within the api folder:
<?php
require dirname(__DIR__)  . '/vendor/autoload.php';

$dotenv = Dotenv\Dotenv::createImmutable(dirname(__DIR__));
$dotenv->load();

set_error_handler('ErrorHandler::handleError');
set_exception_handler('ErrorHandler::handleException');


header("Content-type: application/json; charset=UTF-8");

$database = new Database(
    $_ENV["DB_HOST"],
    $_ENV["DB_NAME"],
    $_ENV["DB_USER"],
    $_ENV["DB_PASS"]
);

$database->getConnection();
.env file with the correct credentials for your database connection. Replace the placeholders DB_HOST, DB_NAME, DB_USER, and DB_PASS with the appropriate values corresponding to your database configuration.TESTING THE DATABASE CONNECTION
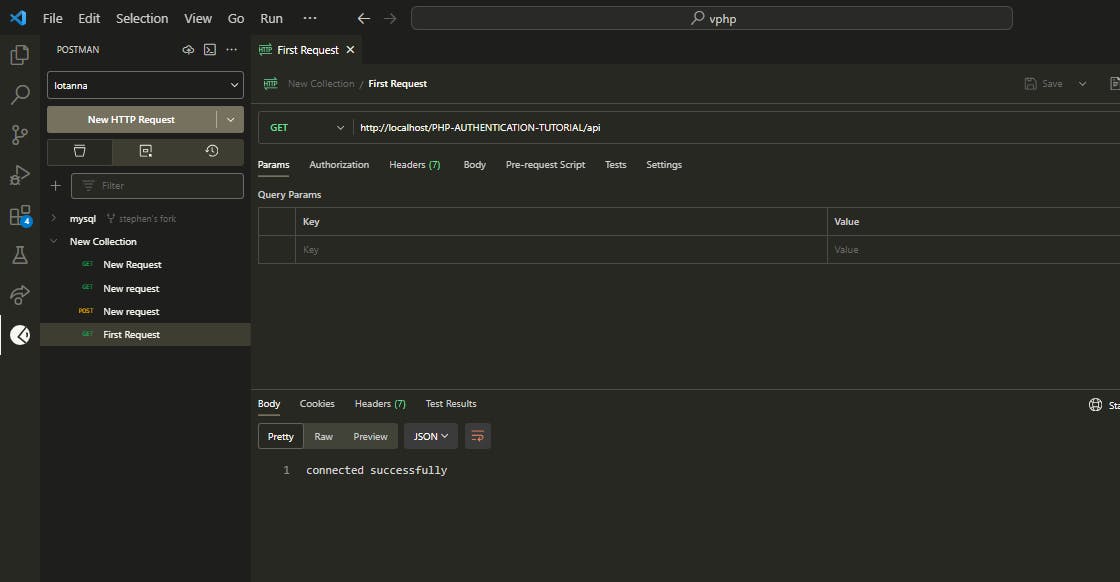
to test if our DB is working properly let's echo a "connected successfully" message in our Database class and then fire our api (http://localhost/PHP-AUTHENTICATION-TUTORIAL/api)
Your database class should look like this:
<?php

class Database
{
    private ?PDO $conn = null;

    public function __construct(
        private string $host,
        private string $name,
        private string $user,
        private string $password
    ) {
    }

    public function getConnection(): ?PDO
    {
        try {
            if ($this->conn === null) {
                $this->conn = new PDO("mysql:host=$this->host;dbname={$this->name}", $this->user, $this->password);
                $this->conn->setAttribute(PDO::ATTR_ERRMODE, PDO::ERRMODE_EXCEPTION);
                $this->conn->setAttribute(PDO::ATTR_EMULATE_PREPARES, false);
                $this->conn->setAttribute(PDO::ATTR_STRINGIFY_FETCHES, false);

                echo 'connected successfully';
            }


            return $this->conn;
        } catch (PDOException $e) {
            echo "Connection failed: " . $e->getMessage();
            return null;
        }
    }
}
Upon firing the API, a successful database connection should result in a response indicating "Connected successfully"
Access the complete source code by following this link.
Establishing the Register.php HTML Template
Next, we'll design the user interface (UI) to generate the API key. Please note that this UI serves as a simulator for obtaining the API key.
The register.php and style.css files will reside in the root directory of our project.
register.php
<?php
?>

<!DOCTYPE html>
<html lang="en">
<head>
    <meta charset="UTF-8">
    <meta name="viewport" content="width=device-width, initial-scale=1.0">
    <title>User Registration</title>
   <link rel="stylesheet" href="style.css">
</head>
<body>
    <div class="container">
        <h2>User Registration</h2>
        <form action="register.php" method="post">
            <div class="form-group">
                <label for="name">Name:</label>
                <input type="text" id="name" name="name" required>
            </div>
            <div class="form-group">
                <label for="username">Username:</label>
                <input type="text" id="username" name="username" required>
            </div>
            <div class="form-group">
                <label for="password">Password:</label>
                <input type="password" id="password" name="password" required>
            </div>
            <div class="form-group">
                <input type="submit" value="Register">
            </div>
        </form>
    </div>
</body>
</html>
style.css
body,
html {
  margin: 0;
  padding: 0;
  font-family: Arial, sans-serif;
}

.container {
  background-color: #fff;
  padding: 20px;
  border-radius: 8px;
  box-shadow: 0 0 10px rgba(0, 0, 0, 0.1);
  width: 300px;
  margin: 0 auto;
}

h2 {
  text-align: center;
  margin-bottom: 20px;
}

.form-group {
  margin-bottom: 20px;
}

label {
  font-weight: bold;
}

input[type="text"],
input[type="password"] {
  width: 100%;
  padding: 8px;
  border: 1px solid #ccc;
  border-radius: 4px;
  box-sizing: border-box;
}

input[type="submit"] {
  width: 100%;
  padding: 10px;
  border: none;
  background-color: #007bff;
  color: #fff;
  border-radius: 4px;
  cursor: pointer;
}

input[type="submit"]:hover {
  background-color: #0056b3;
}
Get the source code here
Generating an API Key
The API key is generated as a 32-character hexadecimal string using cryptographic functions provided by PHP. It is then securely stored in the database and made available to the us upon successful registration. The API key serves as a unique identifier and is used for authentication when accessing protected resources like our students data.
The subsequent code snippet illustrates the method used to generate our API Key:
register.php
<?php

require __DIR__ . "/vendor/autoload.php";

if ($_SERVER["REQUEST_METHOD"] === "POST") {

    $dotenv = Dotenv\Dotenv::createImmutable(__DIR__);
    $dotenv->load();

    $database = new Database($_ENV["DB_HOST"],
                             $_ENV["DB_NAME"],
                             $_ENV["DB_USER"],
                             $_ENV["DB_PASS"]);

    $conn = $database->getConnection();

    $sql = "INSERT INTO user (name, username, password_hash, api_key)
            VALUES (:name, :username, :password_hash, :api_key)";

    $stmt = $conn->prepare($sql);

    $password_hash = password_hash($_POST["password"], PASSWORD_DEFAULT);
    $api_key = bin2hex(random_bytes(16));

    $stmt->bindValue(":name", $_POST["name"], PDO::PARAM_STR);
    $stmt->bindValue(":username", $_POST["username"], PDO::PARAM_STR);
    $stmt->bindValue(":password_hash", $password_hash, PDO::PARAM_STR);
    $stmt->bindValue(":api_key", $api_key, PDO::PARAM_STR);

    $stmt->execute();

    echo "Your API key is ", $api_key;
    exit;
}

?>
<!DOCTYPE html>
<html lang="en">
<head>
    <meta charset="UTF-8">
    <meta name="viewport" content="width=device-width, initial-scale=1.0">
    <title>User Registration</title>
   <link rel="stylesheet" href="style.css">
</head>
<body>
    <div class="container">
        <h2>User Registration</h2>
        <form action="register.php" method="post">
            <div class="form-group">
                <label for="name">Name:</label>
                <input type="text" id="name" name="name" required>
            </div>
            <div class="form-group">
                <label for="username">Username:</label>
                <input type="text" id="username" name="username" required>
            </div>
            <div class="form-group">
                <label for="password">Password:</label>
                <input type="password" id="password" name="password" required>
            </div>
            <div class="form-group">
                <input type="submit" value="Register">
            </div>
        </form>
    </div>
</body>
</html>
How To Use Our API Key
We'll create a User.php file in our src folder and define our User class inside it.
This class helps us check if the correct API key is used by fetching user data from the database.
class User
{

    private PDO $conn;

    public function __construct(Database $database)
    {
        $this->conn = $database->getConnection();
    }

    public function getByAPIKey(string $key): array | false
    {
        $sql = "SELECT *
                FROM user
                WHERE api_key = :api_key";

        $stmt = $this->conn->prepare($sql);

        $stmt->bindValue(":api_key", $key, PDO::PARAM_STR);

        $stmt->execute();

        return $stmt->fetch(PDO::FETCH_ASSOC);
    }
}
To actualize this we will create an Authenticate class in our src folder, This will serve to validate an API key. It checks if the API key is provided in the HTTP header. If not, it returns a 400 (Bad Request) error. Then, it retrieves user data associated with the API key from the database. If the API key is invalid or not found, it returns a 401 (Unauthorized) error.
Authenticate.php
<?php

class Authenticate
{
        public function __construct(private User $user)
    {
    }

    public function authenticateAPIKey(): bool
    {

        if (empty($_SERVER['HTTP_X_API_KEY'])) {
            http_response_code(400);
            echo json_encode(["message" => "missing api key"]);
            return false;
        }

        $api_key = $_SERVER['HTTP_X_API_KEY'];

        $user = $this->user->getByAPIKey($api_key);

        if ($user === false) {

            http_response_code(401);
            echo json_encode(["message" => "invalid API key"]);
            return false;
        }


        return true;
    }

}
In PHP, $_SERVER['HTTP_X_API_KEY'] serves as a superglobal variable that captures the value of the "X_API_KEY" header within an HTTP request.
This header, denoted by "HTTP_X_API_KEY," is customized to facilitate the transmission of an API key from the client to the server, specifically for authentication purposes. When interacting with our application. This mechanism ensures secure authentication between the client and the server, allowing seamless access to protected resources based on the provided API key.
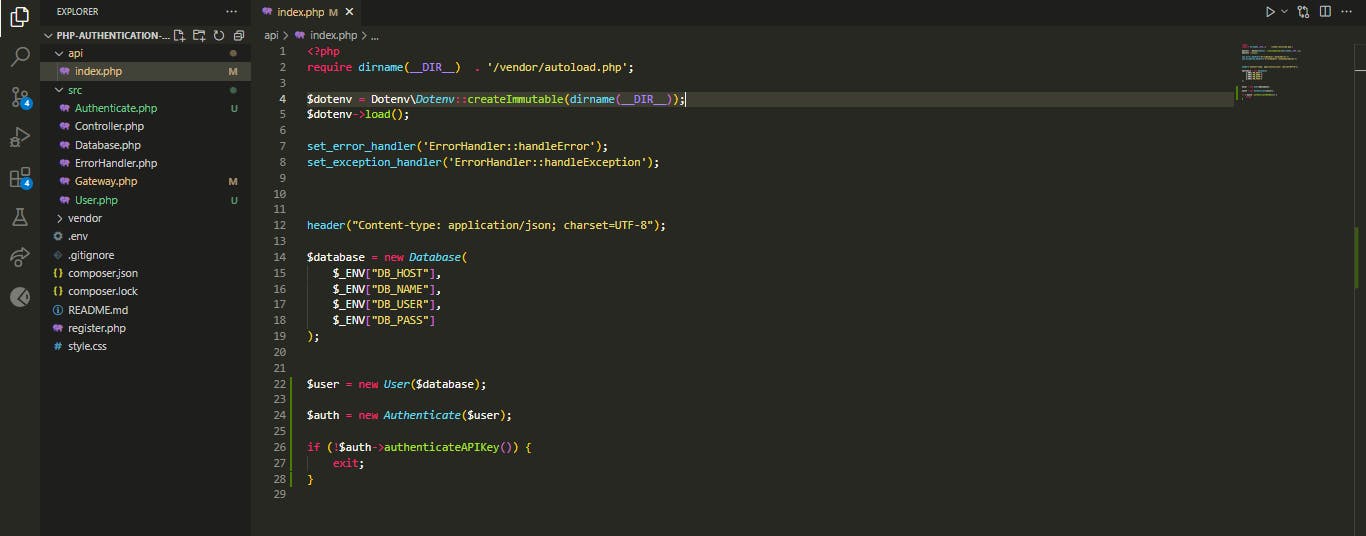
To test the functionality of our API key authentication mechanism, we need to load our classes into our index.php file. This file serves as the entry point for our API and is responsible for handling incoming requests.
The structure of our index.php and project should now resemble the following:
Get the source code here
TESTING OUR AUTHENTICATIAPIKey FUNCTIONALITY
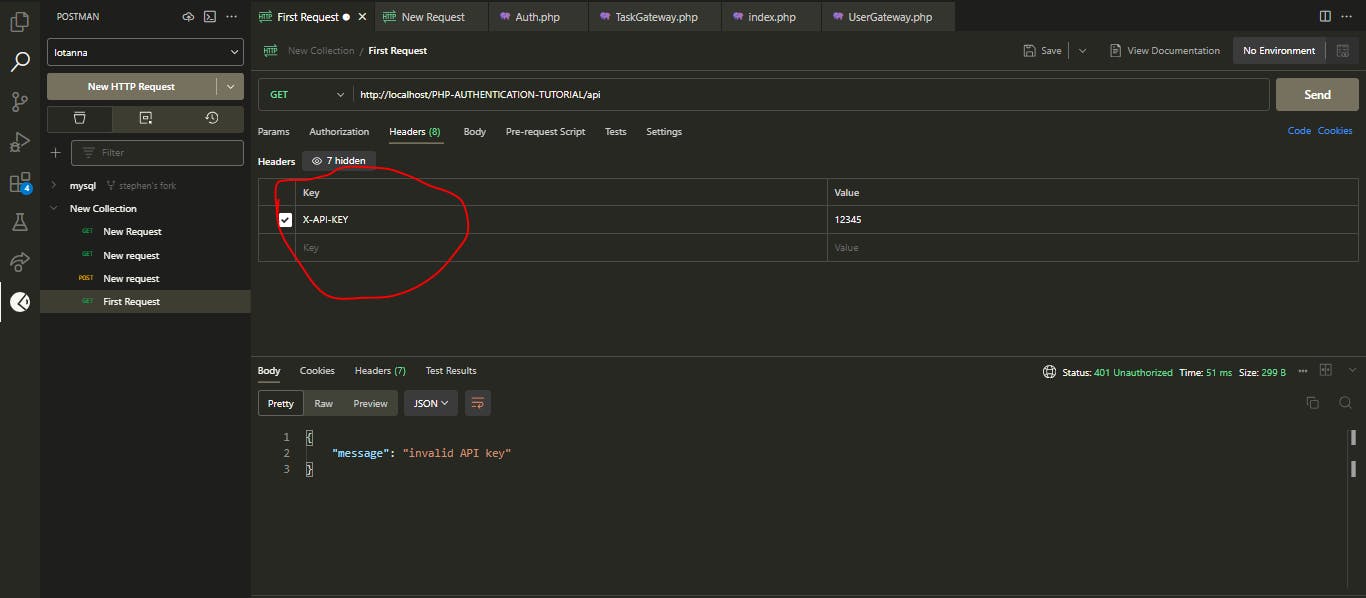
So far, we've made significant progress. Now, let's proceed to test our application by utilizing our custom header, X-API-KEY. We'll pass this API key through the header of our HTTP requests. During testing, we'll explore various scenarios, including:
Passing an incorrect API key intentionally.
Passing the correct API key.
By testing these scenarios, we'll verify the effectiveness of our API key authentication mechanism and ensure that our application behaves as expected in different situations.
Consider different approaches to verify the integrity and authenticity of our project or class.
SETTING UP OUR GATEWAY AND CONTROLLER CLASS
Our Gateway class is responsible for handling database operations responsible for getting data from our students table.
The Controller class serves as a controller for handling HTTP requests.
This is how we structure our controller class and gateway class in our src folder:
Controller.php
class Controller
{
    public function __construct(private Gateway $gateway)
    {
    }

    public function processRequest(string $method): void
    {
        if ($method === "GET") {
            echo json_encode($this->gateway->getAll());
        }else{
            $this->methodNotAllowed("GET");
        }
    }

    private function methodNotAllowed(string $allowed_method): void
    {
        http_response_code(405);
        header("Allow: $allowed_method");
    }

}
Voila! Let us now integrate the classes we've created into our index.php file in our API folder to retrieve our student data. The final structure of our index.php should now resemble this:
require dirname(__DIR__)  . '/vendor/autoload.php';

$dotenv = Dotenv\Dotenv::createImmutable(dirname(__DIR__));
$dotenv->load();

set_error_handler('ErrorHandler::handleError');
set_exception_handler('ErrorHandler::handleException');


header("Content-type: application/json; charset=UTF-8");

$database = new Database(
    $_ENV["DB_HOST"],
    $_ENV["DB_NAME"],
    $_ENV["DB_USER"],
    $_ENV["DB_PASS"]
);


$user = new User($database);

$auth = new Authenticate($user);

if (!$auth->authenticateAPIKey()) {
    exit;
}

$gateway = new Gateway($database);

$controller = new Controller($gateway);


$controller->processRequest($_SERVER['REQUEST_METHOD']);
You can obtain the source code from here
GETTING STUDENTS DATA FROM THE DATABASE
Congratulations on reaching this point!
Life is not easy for any of us. But what of that? We must have perseverance and above all confidence in ourselves. We must believe that we are gifted for something and that this thing must be attained. - Marie Curie
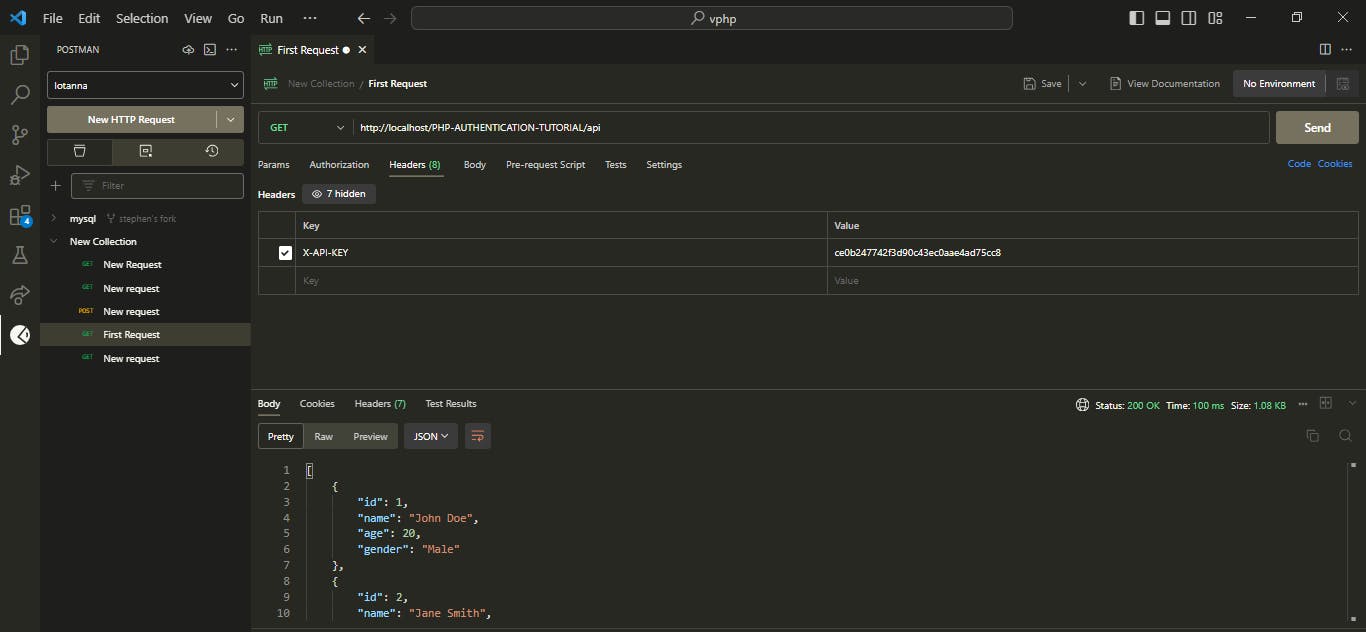
This should be the expected outcome:
CONCLUSION
Adding additional security features such as using a user_id alongside the API key for retrieving student data and implementing a complete CRUD (Create, Read, Update, Delete) operation can enhance the functionality and security of the project. Here's how you can integrate these features:
Enhanced Security with User ID: In addition to the API key, you can require users to provide their
user_idwhen making requests. Thisuser_idcan be associated with specific user accounts in the database. This way, you can ensure that only authorized users can access the data.Complete CRUD Operation: Implementing a complete CRUD operation allows users to perform various actions on the data, such as creating new records, reading existing records, updating records, and deleting records. This provides a comprehensive set of functionalities for interacting with the student data.
